It’s no secret that photography can make or break a blog. Some of the most successful fashion blogs such as Kayture and Gary Pepper Girl rely just as much, if not more so, on beautiful photography as on the clothes they wear. On the opposite end of the spectrum there are so many blogs out there with beautifully styled and innovative looks that are let down by dodgy lighting or bad composition.
I had my trusty ‘ol Sony A200 DSLR camera for about 8 years before I finally invested in a decent Canon (the 6D with a 50mm lens, a blogger standard), and although it served me well over the years, it was far from perfect. The Sony was rubbish with dim lighting, and the standard lens it came with only goes down to F5.6. Out of necessity I’d picked up a few tricks to make my photographs passable which I thought I’d share for those of you starting out who may not want to invest in a professional camera just yet.
KNOW YOUR LIGHT
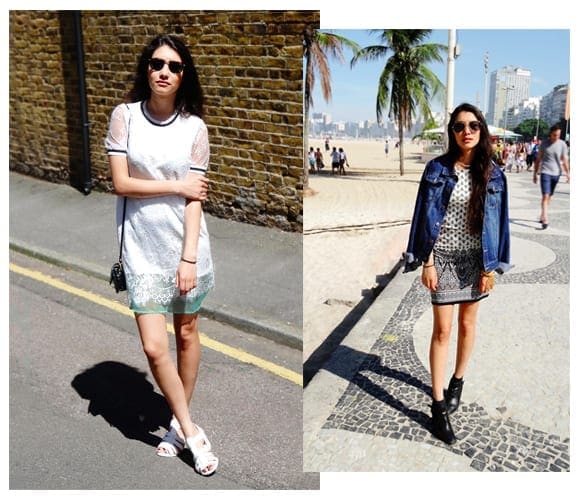
Early looks, before I learnt to avoid harsh sunlight
Lighting is such a mare. Here in London it tends to be gloomy 360 days of the year, which is less than ideal for taking beautiful photographs. However gloomy is actually preferable to bright sunlight, which can ruin photos by casting awkward shadows and making the subject look two-dimensional. If you’re lucky enough to live somewhere sunny, it’s best to either find a spot away from direct sunlight, or wait till the late starts to fade slightly. The most beautiful light for photography is the golden hour just before the sun starts to set, which tends to be less harsh than broad daylight.
WATCH OUT FOR SKY
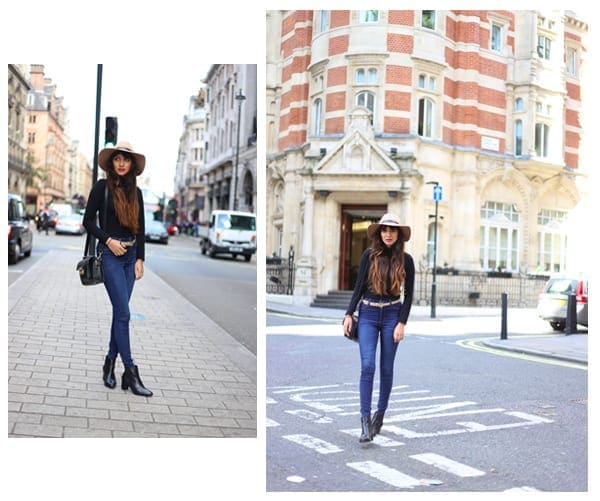
Photographing against sky vs a building backdrop. I prefer the latter!
I’m sure there is a way to shoot against sky and make it look good, but I haven’t figured it out yet. I find sky difficult to shoot against it tends to be the brightest part of the image, therefore automatically darkening the subject (me). Even on the average gloomy London day sky can be a nightmare, as the usual dull grey is far from glamorous! As much as possible I try to find backgrounds that will fill the frame without any pesky sky. Close crop your pictures, or find tall buildings to shoot in front of.
SHOOT OUTDOORS

One of my first ever looks, shot in my bedroom with timer and a tripod!
Most of us fashion bloggers probably started off taking our photos by ourselves with a tripod, self-timer, or even with our mobiles (the horror!). I tried to find the plainest wall in my bedroom, pushing all the usual clutter out of frame and turning on all the lights in an attempt to make it bright enough to shoot. Safe to say the results were pretty poor. Nowadays I would never even consider shooting indoors unless I had a professional photographer and lighting equipment. The quality just isn’t good enough as the lighting tends to be dimmer than outdoors, plus indoor lights will give an overly yellow tint to pictures. If you really must shoot indoors, shoot in the middle of the day as close as you can to windows, and try not to rely on artificial light as natural light is always more flattering!
PHOTOSHOP IS YOUR FRIEND
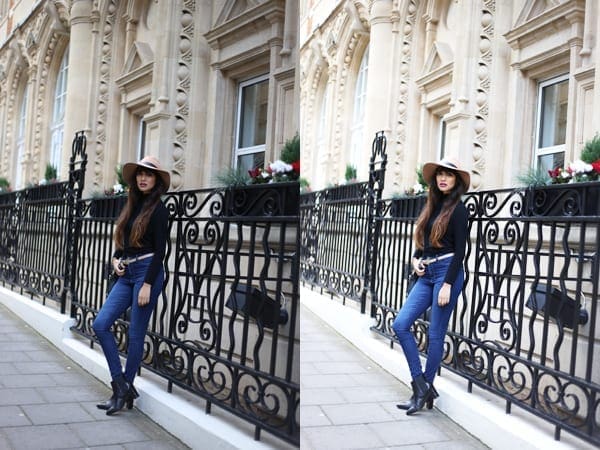
Before and after!
Photoshop can work miracles. It’s the photographer boyfriend you always wanted, and more, if you use it right. The process of editing photos differs from person to person and photo to photo, but I like to work by separating the subject (usually me) from the background, and editing the two separately. This can be done using the selection tool to select myself, and layer masks to create two different layers, one for me and one for the background. My go-to trick for nearly all photos when I was still using a standard lens was blurring the background using the Gaussian Blur tool, to make up for my camera’s rubbish F-stop (use sparingly though!). Curves are also useful for brightening an image and increasing contrast, although you want to use this more on the background as it’s important not to mess up skin-tones and keep the subject looking as natural as possible. Use adjustment layers to ensure that you can play around with settings whilst still keeping the original photo intact in case something goes wrong.
This post is a loose guide of what works for me when taking photos, but there are of course no hard and fast rules. The most important thing is to practise and find what works for you, whether it’s certain locations, angles or lighting. Some bloggers always shoot in direct sunlight and come out with fantastic results, it fully depends on your aesthetic! Nonetheless if you’re just starting out and having trouble (I know it took me a while, heck I’m still learning), I hope this helps a little.


Love this post, cause u are right there are so many interesting styles out there, but the pictures are not so good, it kinda makes you less eager to look more in detail.
https://everydayfacts.wordpress.com
Great tips Anoushka :)
Real Life Nerd // http://www.vivienekok.blogspot.com
Amazing post. Well done! Keep going
Please check my last post blog http://www.welovefur.com
Many kisses
Lady Fur
great tips, I’ll be avoiding sky from now on! X
Eleanor Frances // UK Fashion & Beauty Blog
What a great post, very helpful. Thanks fro sharing! You look stunning by the way!
I write Mademoiselle Meets Maquillage and Macaroons and I would love for you to give it a read. Maybe we can follow each other on Bloglovin?
http://www.mademoisellemeetsmaquillageandmacaroons.com
Deepti xx
Love this post!!
This post is so useful. Photography is such a learning curve. Everytime I take photos I’m learning so much more about light and locations. I always avoid sky too! x
This is so useful! I don’t have a professional camera yet, but I’m currently using the Canon G7X and it’s doing wonders! Amazing quality. Even in dark rooms, it lighten the picture so well.
ashrealasitgets.blogspot.com
Wonderful post, thanks for the helpful tips!
Zara x
Amazing and helpful post! ?
http://www.somethingvogue.com
Hey Anoushka,
Thanks for this. I’m 100% in the beginning photo stage, and this makes me feel better to see your early photos, and then see where you’re at now. Your “now” photos look amazing!
I’ve got the Photoshop thing down… as far as making graphics are concerned, but I definitely need to learn about about editing the actual photos. Do you have any YouTube tutorials you might recommend for this?
Cheers,
Elizabeth
Author
Hi Elizabeth, glad its helpful! Honestly I’m not a big YouTuber so I couldn’t really recommend any particular videos, but I’d suggest looking for tutorials on how to use adjustment layers and tools such as curves and levels for basic photo editing. I’d also say just experiment, I found my editing process through trial and error and the best way to learn is always practice! :)