Being the insta-addict that I am, I’m a complete sucker for a flat lay. Whether you’re trying to create a great feed for fashion, food, or lifestyle, flat lays are a great way to incorporate items you may not necessarily want to wear/feature on your blog, or just to add a bit of white space to make your feed look cleaner.
A good flat lay is Instagram gold, but it takes a lot of practice. There’s an art to arranging random objects in a square without it just looking like a lot of mess, to the ability to get the background just the right shade of white. I’m by no means a brilliant flat layer, but I wanted to share my method as it’s a type of photo I regularly incorporate into my Instagram, and I’ve developed a bit of a process.
Step 1: Prep
Things can get very messy very fast when creating flat lays, so I like to allocate several hours (usually around noon when the light is good) to get several different shots done in one go. If I’m feeling motivated I’ll usually do 3-5 in one go, but if I’m struggling or the light is too dim maybe only 1 or 2.
The first thing I do is put out a big white sheet on the floor near the window in my sitting room (though not always the brightest room in the house, there tends to be the most even light in there). I also have a marble board I occasionally use as a fake desk backdrop or for smaller flat layers – you can buy contact papers off eBay to use as different backdrops.
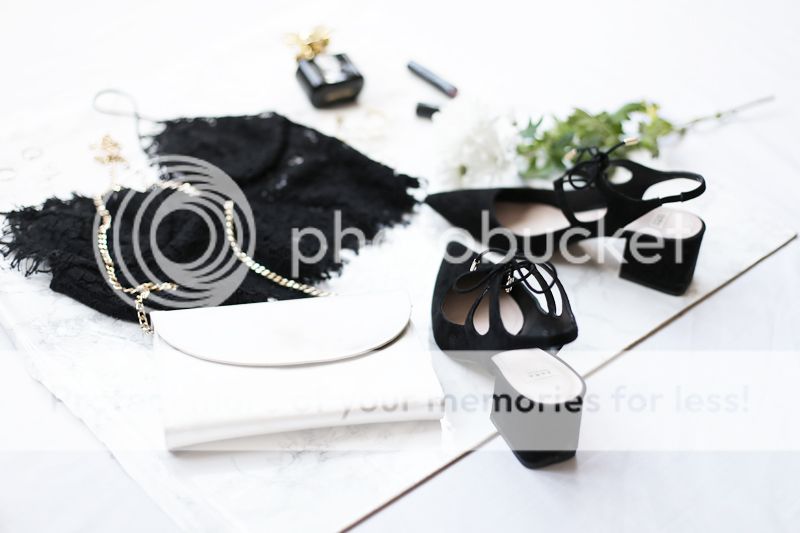
I’ll then collect whatever items I particularly want to flat lay, which is usually any new acquisitions or anything that would work well to create a theme around (denim and stripes tend to be favourites). I’ll also collect any accessories including small bags and shoes, and a selection of ‘filler’ items such as pretty looking makeup, perfume bottles, and jewellery.
Step 2: Inspiration
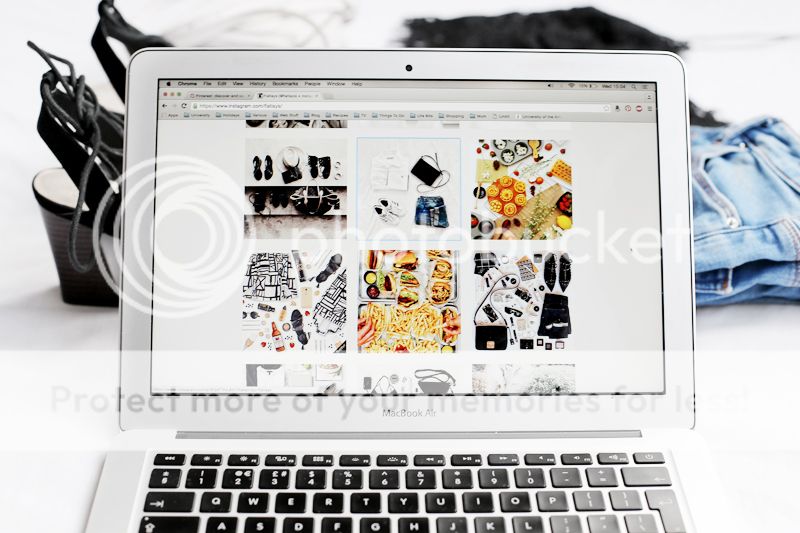
You can’t create in a vacuum! I save my favourite Instagram flat lays and prop photography on a secret Pinterest board to refer to as I work. Instagram itself is also (obviously) a great source of inspiration – check out Flatlays for a great collection of lays, as well as my favourite flat lay masters, Margaret Zhang and Charli Burrowes. Looking at other people’s work is particularly helpful to think of interesting formations of items, or if you’ve got a particularly weird shaped or different item to shoot – chances are someone has found a good way to shoot it already!
Step 3: Start Testing
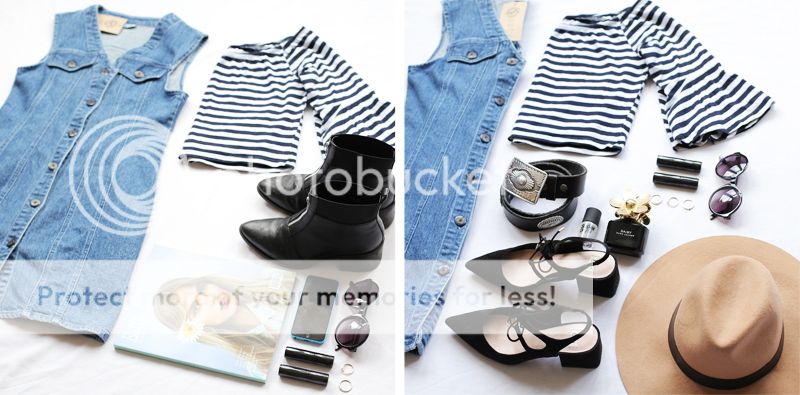
Usually I’ll mix together items with a similar colour scheme alongside black additional items, and gold accents. My favourite ways to combine objects are either creating a messy abstract layout with a central main piece, or in organised blocks, filling in any spaces created by non-square shaped objects with jewellery.
The items you put down will rarely be perfect straight away. I like to add items a few bits at a time, then step back and see how they’re all looking together. Common problems are if one item is far bigger than the others (if it’s clothing, try folding or scrunching it), if one colour doesn’t quite fit, or if everything isn’t quite lining up in a square. This is where filler items can make all the difference, so use an little additions such as jewellery liberally – as long as the don’t overpower the main pieces!
Step 4: Snap the Shot!
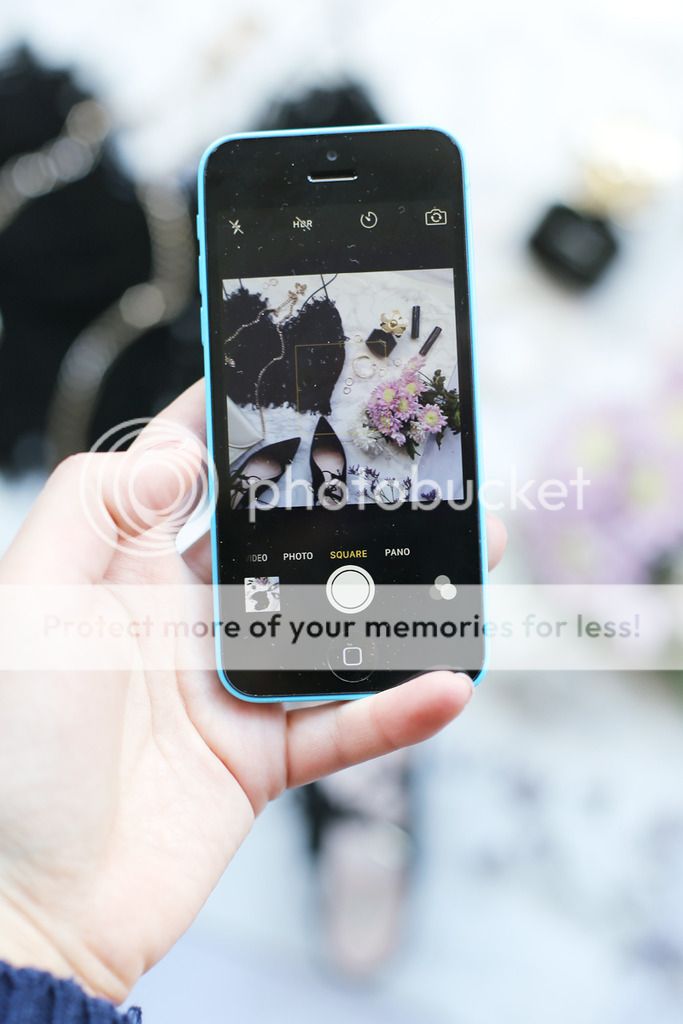
I’ll usually be taking photos on my iPhone as I go along, just to see how everything is fitting into the square. Once I’ve got the shot, I’ll usually pull my main Canon out, jump on a chair, and shoot with that instead (always shoot from above!).
I know it’s sort of cheating, but I like my Instagrams nice and bright, and using a good quality camera ensures that I can up the brightness without the photo becoming grainy. Of course if it’s bright enough I’ll stick to iPhone, but at this time of year it rarely is!
Step 5: Editing
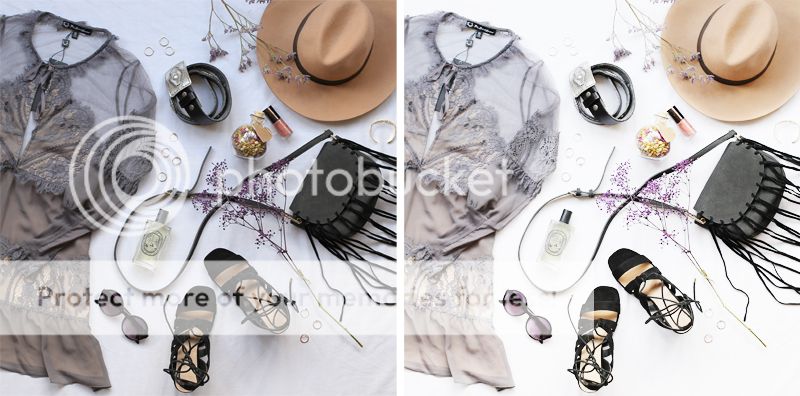
If I’ve used my Canon camera, I’ll go through the photos on my computer just to decide which I want to use. When I’ve decided I’ll use photoshop to make sure everything is straight (shooting from above means you can’t always see what you’re shooting, so things can be a bit wonky!), and crop to a square. I might up the brightness slightly, but I generally save that for my apps.
Once I’ve sent the photo to my phone, I use Afterlight to adjust the brightness, trying to get the background as close to pure white as possible. It’s also worth playing with warmth and highlight hues, as well as decreasing the saturation if necessary – the biggest factor that lets down an otherwise good flat lay is a dodgy coloured background! If I’m really struggling, Snapseed is great for fine-tuning (and it’s free!). With the brush tool you can specifically adjust the exposure or saturation of the background (or any other elements you want to fix).
I rarely use Instagram’s editing tools, however sometimes I find my pictures go a bit pink-toned when I post them, so I’ll occasionally use the Clarendon filter on a low setting to combat any pinkness. Other than that, it’s good to go!
I hope my process helps any budding flat layers out there! I’d love to know if you have any top tips for getting a great flat lay, or for Instagram in general?


You make some great flat lay images. I sometimes struggle on making the flat lays interesting because I feel like I don’t have enough pretty things around the house T_T sigh.
https://www.deasynoel.com
These are kinda hard to do so thanks for this tuto, it (almost) seems easy that way ! ;)
https://i-think-its-today.blogspot.com
I LOVE this post, I am currently using a plain white board as a background, but I’d love to get a few patterned ones
Lilies and Lipbalm
xx